Menu Entries Configuration
General
To access the Survey Menu entries table: Configuration -> Settings -> Survey menu entries
This function allows you to create, edit or delete survey menu entries. To be visible/displayed, these entries have to be added into a menu.
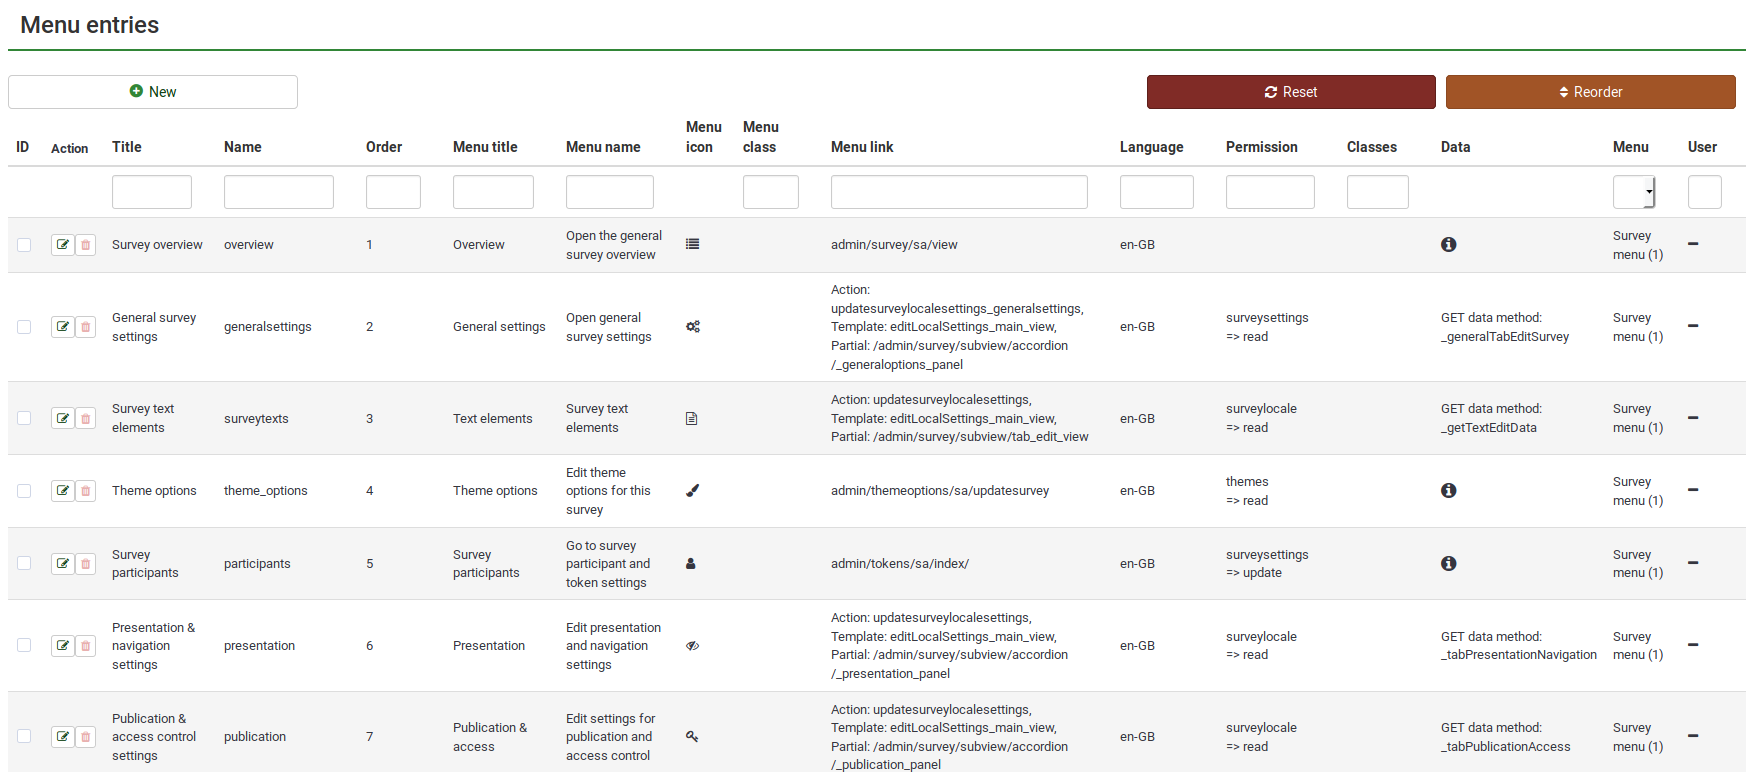
Menu entries configuration

The following actions are available:
- Create a menu entry
- Edit menu entry
- Delete menu entry
- Reorder menu entries
- Reset menu entries to the default values
Create a menu entry
To create a new menu entry, click the + New button located on the top-left side of the window. The following menu options will be displayed:
- Name: Type in the name of the menu entry;
- Title: The title of the respective entry which will be displayed in the menu or under certain tabs (e.g., under the survey settings tab)
- Ordering: If more menu entries are added to a menu, use this function to order them.
- Menu title: On a tab or a menu entry, the menu title will be displayed on the first line. For example, if you click Overview, located under the Survey settings tab, the overview panel will be displayed with the (menu) title: Survey overview
- Menu name: Displayed when you hover the mouse over the respective entry. For example, if you hover the mouse over Theme options, the following message will show up: Edit theme options for this survey.
- Menu icon: All the used icons are fontawesome icons by default. Enter in the box the string located after "fa fa-". E.g., for a floppy disk, we have "fa fa-floppy-o". To use it as an icon for a menu entry, type in this box only "floppy-o".
- Menu icon types: Depends on the ones used within your current theme.
- Menu class:
- Menu link: Link the menu entry to the URL of that function
- Permission:
- Permission grade:
Edit menu entry
To change the details of an already existing menu entry, click the green button located in the Action column. The respective menu will get selected and you can do the edits.
Delete menu entry
To delete a menu entry, click the red trash button that corresponds to that respective menu entry (located in the Action column).
Reorder menu entries
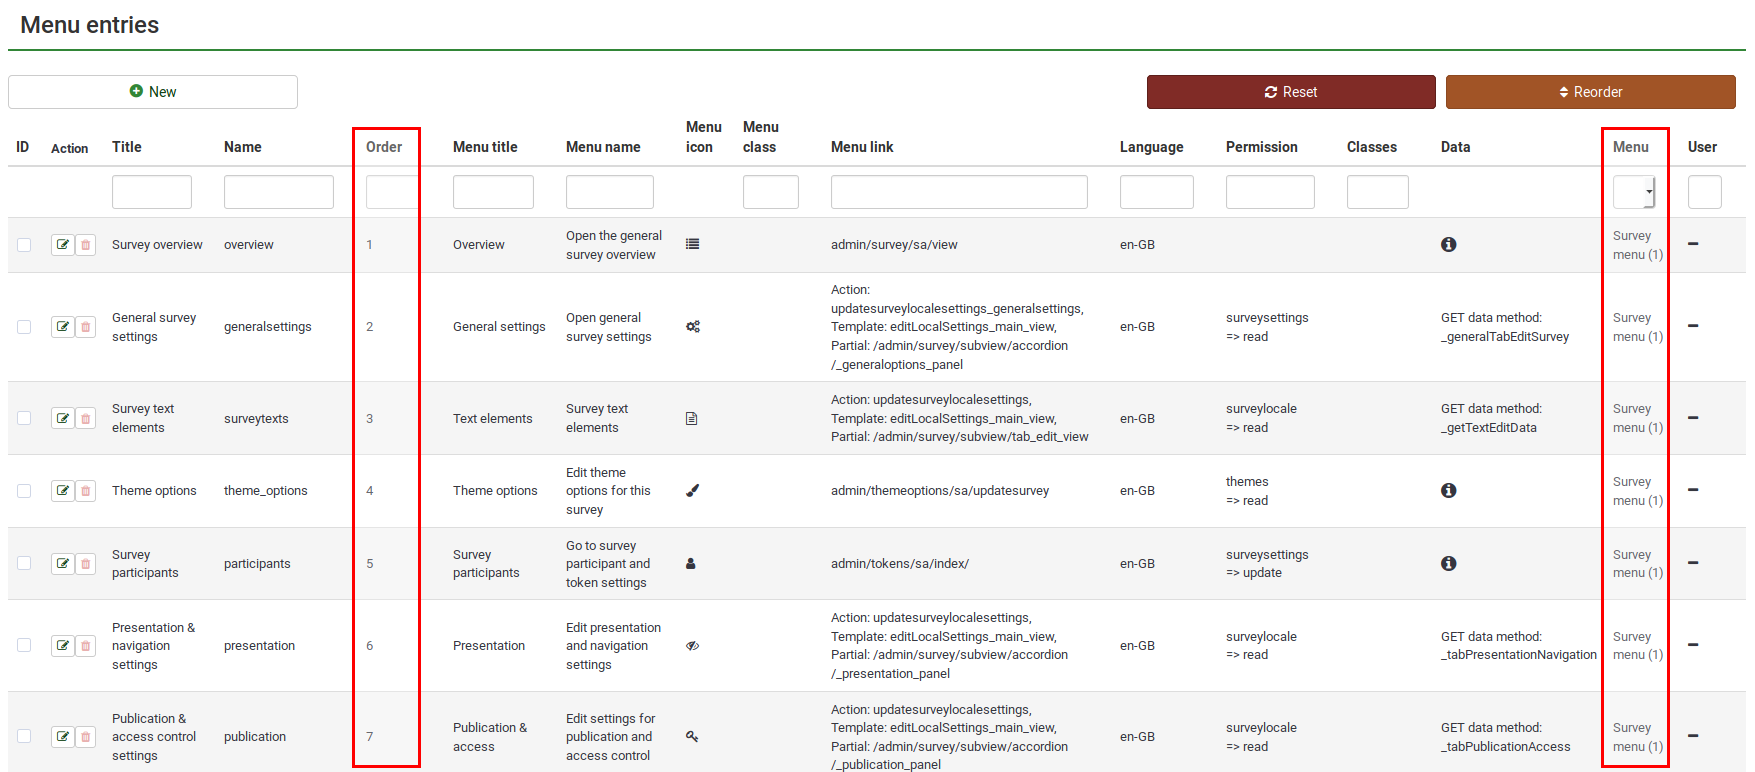
The ordering process takes first into account the menu an entry belongs to, and then it orders the entries according to the value from the order field. Once you change these values, click the reorder button to get the entries rearranged in the table.

Reset menu entries to the default values
To reset all the values of the survey menu entries to their default values, click the reset button located in the upper right part of the screen. A message will be displayed asking you to confirm the action. Please note that once you confirm the action, all the custom menu entries will be lost.
Examples
I want to add a new menu entry to the default survey menu
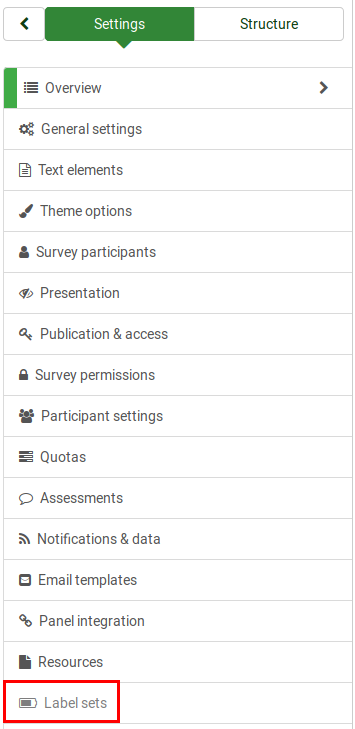
This example demonstrates how to add a Label sets menu entry to the default survey menu.
First, click the + New button located on the top left side of the screen and start completing the fields:
- Menu: Select from the dropdown list the menu you wish to add to the menu entry.
- Name: labelsets.
- Order: 20.
- Menu title: Label sets.
- Menu name: "Click here to edit the available sets."
- Menu icon: In the screenshot from above, I used "fa fa-battery-three-quarters".
- Menu icon type: Select from the dropdown box the "Fontawesome icon" option.
- Menu link: Find the URL of the option you wish to link the entry to, and copy everything after the website name (admin/labels/sa/view in our case):
Click the create button and see if the new survey menu entry was added:

Check the survey menu and see if the survey menu entry is functional:

Advanced options - menu entries
When creating or editing a menu entry, you may find in the lower right part of the dialog the Toggle advanced options button. The following extra fields will be shown once you click it:
- Action
- Template
- Partial
- Classes
- Data
- Get data method
- Language
Once the edits are done, click Save.
Related Articles
Menu Configuration
General To create a new menu or add new menu entries to a preexisting menu: Configuration -> Settings -> Survey Menu You can change the existing survey menus or create a special survey menu for a certain user groups. You can also add new menu entries ...Overview - Configuration Tab
General The Configuration tab contains three menus: Advanced, Users, and Settings. Advanced menu The functionality here can be used to change survey themes, add/edit label sets, check for data consistency, and do a backup of your database. It also ...Introduction
General Settings is the third menu under Configuration, located in the top navigation bar of the home page. There are five items listed under Settings. Settings menu The five options under the settings menu can be used to customize your LimeSurvey ...Introduction
General Advanced is the first menu under Configuration located in the top navigation bar of the home page. The functionality here can be used to change survey themes, add/edit label sets, check for data consistency, and do a backup of your database. ...Introduction
Users menu Users is the second menu under Configuration, located in the top navigation bar of the home page. There are four items listed in the Users menu. The options are related to user and participant management. User management User groups User ...