Home Page Settings
General
Use the Dashboard to customize your home page: Configuration-> Settings -> Dashboard
Besides editing home page settings, new boxes (for different user groups) can be created to facilitate the management of your LimeSurvey installation.
Dashboard settings
The following home page settings are available:
- Display logo: If it is turned 'Off', the logo situated above the boxes disappears (the default value is 'On')
- Show last visited survey and question: Turned 'On' by default. It shows the last visited question and survey, the bar being located between the logo and the boxes
- Show survey list: The default value is 'Off'. If you switch it to 'On', a survey list will appear below the boxes from the home page
- Show search box on survey list: If it is ticked 'Off', the search box will not be shown in the survey list. Please note that this option does not have any effect on your home page if the Show survey list option is not turned on
- Wrap container around Boxes (New in 3.0 ): If it is turned 'On', the container around each box gets smaller (useful function when more boxes are added to your home page)
- Boxes by row: The number of boxes you would like to have on each row. The default number is '3'
- Box orientation (New in 3.0 ): Three options are available: left to right, right to left, centered
Click Save boxes settings once you are done. If everything is turned on, the home page should look like this: 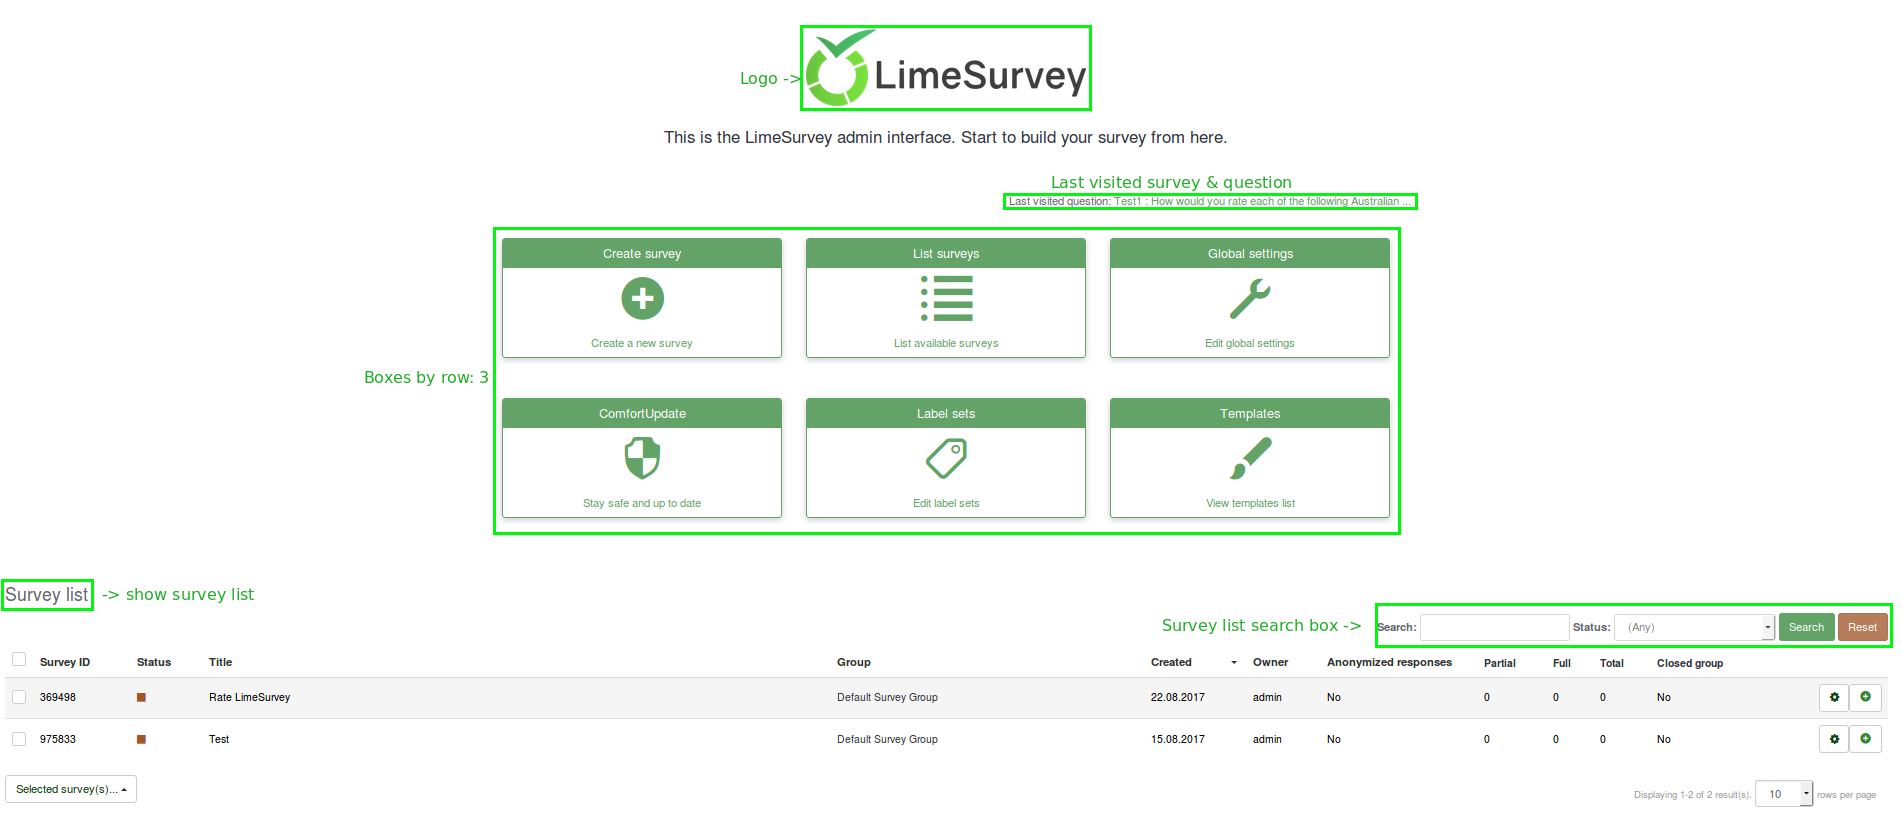
Boxes
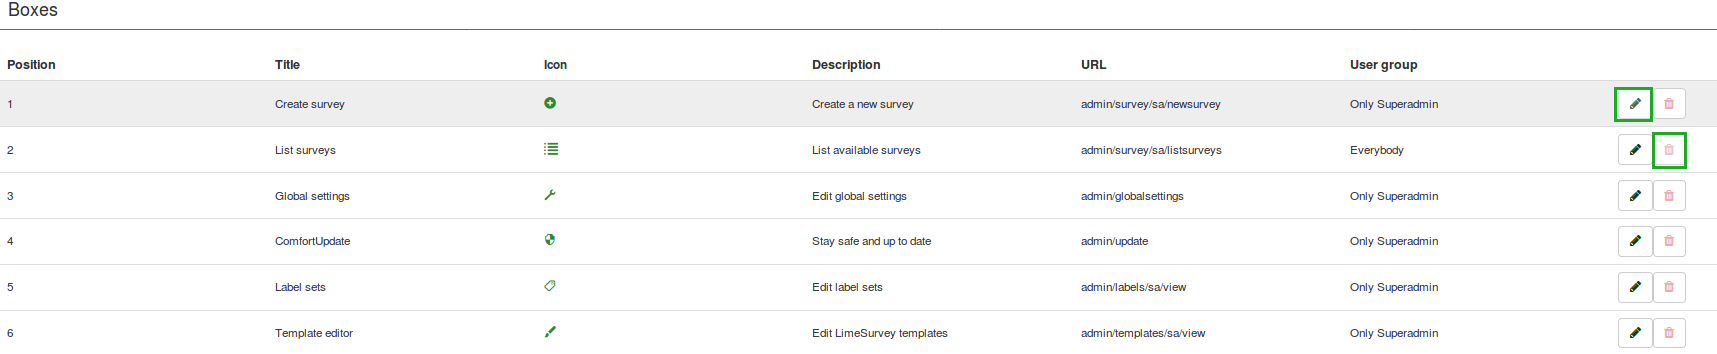
The LimeSurvey installation comes by default with six boxes created: Create survey, List survey, Global settings, ComfortUpdate, Label sets and Templates. They can be either edited (the green pen button) or deleted (the red trash button):
Create/Edit a box
To add a new box into the Boxes table, click Create a new box, located in the upper part of the screen:
.
Different fields have to be filled in:
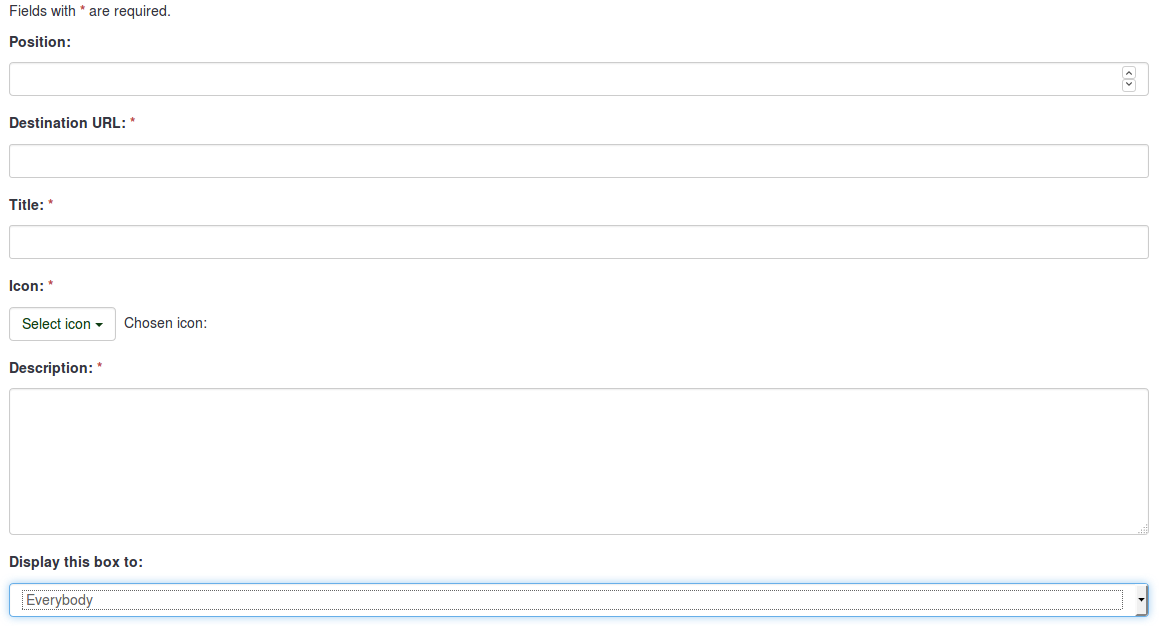
- Position: shows the box position (it is a numerical value)
- Destination URL: the link via which the respective option/function is accessed. For example, the destination URL to backup the entire database is admin/dumpdb
- Title: name of the box
- Icon: allows the user to select one of the LimeSurvey predefined icons
- Description: short description of the purpose of the box
- Display this box to: allows you to choose who can see the respective box
- Only admin : only the super administrator of the LimeSurvey installation can see those respective boxes
- Everybody : everyone who logs in the LimeSurvey installation can see those respective boxes, i.e. survey users defined in the User control panel.
- Nobody : nobody can see those boxes. It can be used when you would like to hide boxes from a specific user group for example
- Other user groups : a certain user group is allowed to see those boxes. To find out more about user groups, read our article on how to manage them.
Once done, click the Save button that is located in the upper right part of the screen.
Reset to the default settings
If want to reverse the changes that you made, click the Reset to default boxes button, located on the upper right side of the window. This would restore the default boxes.
Examples
I want to create a new box
- Access Home page settings from the Configuration dialog.
- Click Create new box, located in the upper right part of the window.
- Enter the requested information
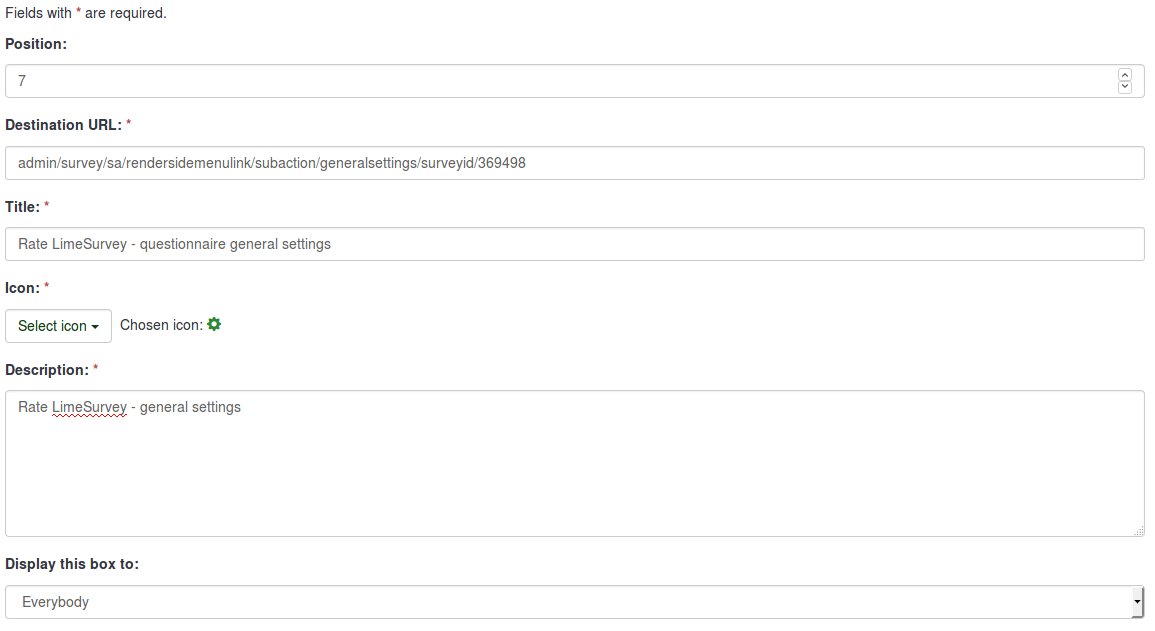
The destination URL can be found in the address bar. In this example, the URL leads to the General settings of a survey:
- Save the box and access the home page of your LimeSurvey installation.

- Click the newly created box and check whether it is working or not (if not, recheck its destination URL):
Related Articles
Introduction
General Settings is the third menu under Configuration, located in the top navigation bar of the home page. There are five items listed under Settings. Settings menu The five options under the settings menu can be used to customize your LimeSurvey ...Global Settings
Overview Global Settings in LimeSurvey can be accessed via Configuration → Settings → Global settings, where the options are grouped across several screens. Only administrators with the "Settings and Plugin permission" may modify these ...User Roles
Overview Administrators can assign roles through the global permissions functionality; a role bundles the permissions its users receive. Accessing User Roles To manage user roles, navigate to: Configuration → Users → User roles Role Action Buttons ...ComfortUpdate
ComfortUpdate is a professional service from LimeSurvey GmbH for updating LimeSurvey from the browser, with no manual file replacement. ComfortUpdate is only for supported self-hosted LimeSurvey installations. It is not used for LimeSurvey Cloud — ...Manage Users
User Management The user management tool allows you to add additional administration users to LimeSurvey. These are referred to as 'users' and should not be confused with survey participants. Add Users To add a new user, navigate to Configuration on ...